Skip to content
    New: Medical Gas Outlet Retrofit & Rebuild Matrix — cross-reference legacy Chemetron, Ohio Diamond, Puritan-Bennett & more →
    ASSE Certified 24/7
    Medical Gas Service
    Compliance & Standards

    Medical Vacuum Pump Preventive Maintenance: The Complete Checklist

    Medical Testing SolutionsNovember 9, 202617 min read
    Share
    Medical Vacuum Pump Preventive Maintenance: The Complete Checklist

    Medical Vacuum Pump Preventive Maintenance: Complete Guide

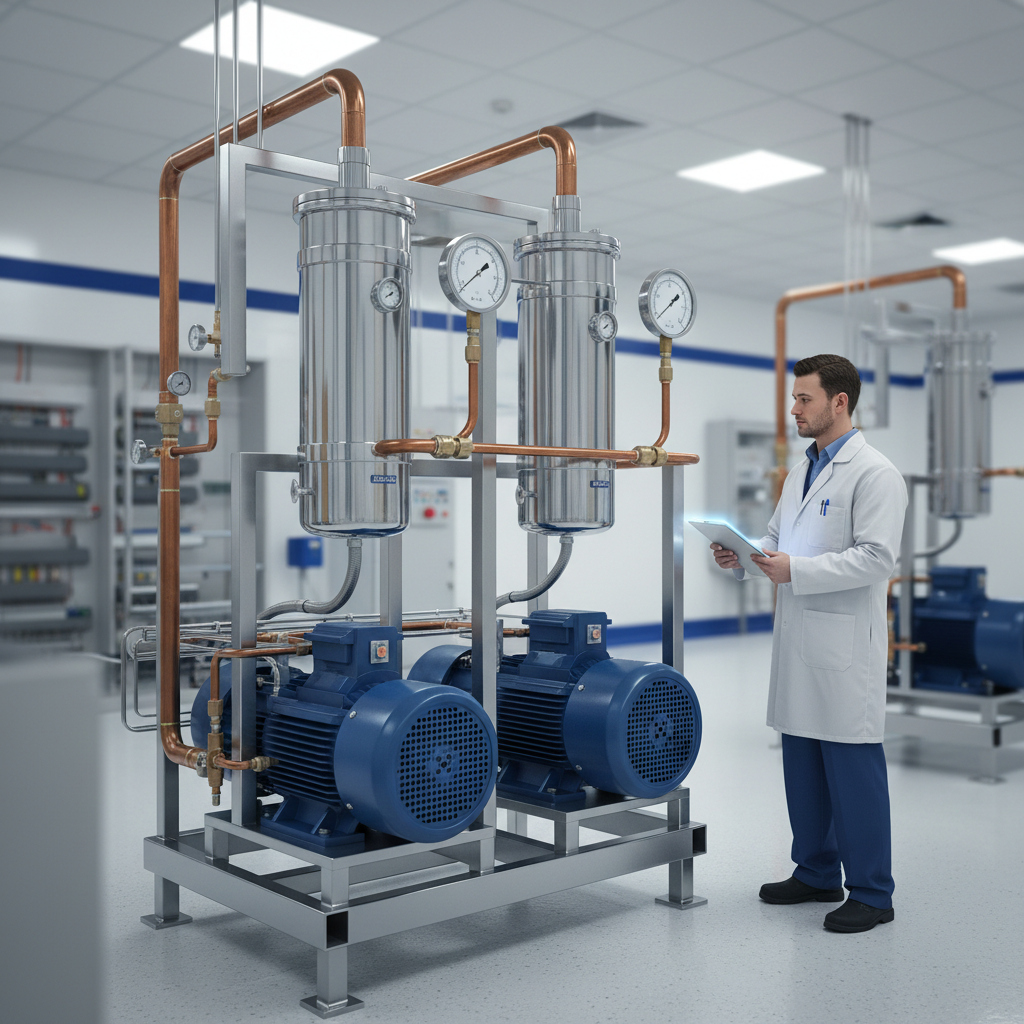
    Medical vacuum systems provide critical life-safety support across healthcare facilities, removing fluids, blood, and gases during surgeries and emergency interventions. Without disciplined medical vacuum pump preventive maintenance, mechanical degradation leads to vacuum pressure loss, oil contamination, pump seizure, or catastrophic system failure. This compromises operating rooms, intensive care units, and emergency departments.

    In this definitive guide, facility directors, clinical engineers, and biomedical technicians will learn the mandatory standards governing healthcare vacuum sources under NFPA 99, daily and periodic maintenance schedules, pump technology differences, troubleshooting protocols, and compliance documentation requirements. Implementing a rigorous preventive maintenance program ensures continuous system uptime, protects patient safety, and prepares your facility for Joint Commission and AHCA surveys.


    1. Why Medical Vacuum Preventive Maintenance Protects Patient Care

    Unlike industrial vacuum installations, a medical-surgical vacuum system is classified as a Category 1 Life Support utility under NFPA 99: Health Care Facilities Code. In an operating theater, surgical aspirators rely on uninterrupted, stable negative pressure to clear surgical fields, evacuate smoke, and sustain airway suction during intubation.

    A sudden drop in vacuum pressure below clinical thresholds, typically 12 inches of mercury ($12\text{ in. Hg}$) at the farthest terminal inlet, presents an immediate life-safety hazard. Beyond sudden pump seizures, inadequate maintenance causes creeping performance deficits:

    • Elevated Operating Temperatures: Blocked exhaust mist eliminators or degraded lubricants increase internal friction, tripping thermal overloads during peak facility demand.
    • Oil Vapor Carryover: Saturated separator elements in oil-sealed rotary vane pumps release hydrocarbon mist into mechanical rooms or bypass exhaust runs.
    • Loss of System Redundancy: A neglected lag pump failing to start during high surgical loads forces the lead pump into continuous operation, accelerating total system degradation.

    Why this matters for compliance: NFPA 99 (2024 Edition, Section 5.1.14.2.1) mandates that healthcare facilities establish a formal preventive maintenance program for all Category 1 medical gas and vacuum source equipment. Accreditation bodies such as The Joint Commission (TJC) inspect PM service records under Environment of Care standard EC.02.05.01, requiring physical documentation of manufacturer-recommended service intervals and ASSE-certified competency.

    To maintain these life-critical utilities, hospital engineering teams partner with medical gas maintenance services to audit source equipment, balance operational hours, and certify operational safety.


    2. NFPA 99 and ASSE 6000 Compliance Requirements for Vacuum Sources

    Healthcare facility managers must align their maintenance procedures with strict regulatory codes established by the National Fire Protection Association (NFPA) and the American Society of Sanitary Engineering (ASSE). | Diagram text | |, | | NFPA 99 Health Care Facilities Code | | Category 1 Vacuum Source (Ch. 5.1.3.7) | | Physical Source Criteria Personnel Qualifications | | • N+1 Redundancy (Peak Load Support) • ASSE 6040: Maintenance Personnel | | • Dual Exhaust Lines to Outdoors • ASSE 6030: Verification Inspectors | | • Dual Bacteria Filters + Drains • Documented PM Logs for CMS / TJC | | • Receiver Bypass Configuration • Calibrated Gauge Testing Records |

    NFPA 99 Chapter 5 Source Criteria

    Per NFPA 99 Section 5.1.3.7, a medical-surgical vacuum source must satisfy specific engineering configurations:

    1. Redundancy (N+1 Requirement): The central vacuum system must consist of two or more pumps capable of serving peak calculated facility demand with the single largest pump out of service.
    2. Exhaust Discharge: Vacuum exhaust must terminate outdoors, distant from public areas, HVAC fresh air intakes, doors, and operable windows, preventing back-draft of biological contaminants or oil aerosols.
    3. Inlet Filtration: Dual bacterial filters (or duplex inlet filtration configurations) with isolation valves are required to allow filter element replacement without shutting down vacuum delivery to patient wings.
    4. Receiver Bypass: Vacuum tanks must incorporate bypass piping so the receiver can be isolated, drained, and inspected without taking the facility's negative pressure offline.

    ASSE 6000 Series Standards

    The ASSE 6000 professional qualifications series establishes who can touch, inspect, and certify these systems:

    • ASSE 6040 (Medical Gas Maintenance Personnel): Outlines core competencies for hospital personnel and contracted technicians performing maintenance on medical vacuum pumps, air compressors, and alarm panels.
    • ASSE 6030 (Medical Gas Systems Verifier): Verifies modifications, major component replacements, and newly commissioned pump skids.
    • ASSE 6010 (Medical Gas Installer): Required whenever piping alterations, pump drop installations, or receiver tie-ins occur.

    When replacing pump heads, vacuum receivers, or rebuilding drive assemblies, facilities must schedule formal medical gas verification under ASSE 6030 criteria to document that cross-connections were avoided, flow rates meet facility design, and emergency alarms function correctly.


    3. Comparing Vacuum Pump Technologies: Maintenance Profiles

    Healthcare facilities deploy several distinct vacuum pump technologies based on water availability, energy profiles, and operating duty cycles. Understanding your specific pump architecture dictates parts inventory, lubricant selection, and PM cadence.

    Pump TechnologyOperating PrinciplePrimary PM DemandsFailure ModesMaintenance Cost
    Oil-Sealed Rotary VaneEccentric rotor with sliding composite/metal vanes; circulating oil seals clearancesOil & exhaust filter changes; anti-suckback valve checks; vane wear measurementSaturated exhaust filters; thermal breakdown of oil; broken vanesModerate (predictable consumables)
    Dry Rotary VaneSelf-lubricating carbon-graphite vanes sliding against cast iron housingCarbon vane thickness measurement; dust filter blowout; bearing greasingVane breakage from thermal expansion; housing washboardingLow-to-Moderate (periodic vane kits)
    Liquid RingRotating impeller forms a liquid ring (water or fluid) that compresses/draws vacuumSeal-water flow control; heat exchanger flushing; cavitation checks; mechanical sealsMineral scaling in impeller housing; seal-water supply loss; cavitation erosionModerate-to-High (water/utility heavy)
    Contactless ClawCounter-rotating claw rotors synchronized by timing gears; dry pumping chamberGearbox oil changes; claw clearance inspections; inlet screen cleaningGearbox seal leakage; foreign particle ingestion jamming clawsLow (extended operating intervals)
    Diagram text
    ,
    [Inlet] -> [Bacterial Filter] [Inlet] -> [Inlet Screen/Fil]
    [Vane/Rotor Oil Bath] [Dry Intermeshing Claws]
    [Oil Separator Element] [Exhaust] [Gearbox Oil Box]
    └───────────────────────────────┘
    [Exhaust to Outdoors] * Zero fluid in pump chamber

    Oil-Sealed Rotary Vane Pumps

    Dominant in clinical installations due to deep ultimate vacuum capabilities ($29.9\text{ in. Hg}$). Maintenance revolves around oil purity and exhaust coalescing filters. If oil degrades, thermal dissipation drops, leading to varnish buildup inside the rotor chamber.

    Contactless Dry Claw Pumps

    Claw pumps feature counter-rotating, intermeshing rotors that operate without internal friction or lubricating fluids inside the pumping chamber. Their mechanical design eliminates internal vanes and oil separators. PM focuses heavily on gearbox lubricant replacement, maintaining inlet silencers, and ensuring silencer check valves do not seize.

    Liquid Ring Pumps

    Common in legacy facilities and large academic campuses. Liquid ring pumps use water to form a hydraulic seal. Hard water leads to calcium scaling along the impeller and casing, elevating motor amp draw and triggering motor starter overloads. Water treatment, water strainers, and cooling loop heat exchangers represent the core maintenance domain for these units.


    4. Comprehensive Medical Vacuum Pump PM Checklist

    To help facility personnel execute structured maintenance, Medical Testing Solutions (MTS) recommends structuring your medical vacuum pump preventive maintenance protocol across four operational tiers: daily checks, monthly inspections, quarterly service, and annual major overhauls. | Diagram text | |, | | TIER 1: DAILY / WEEKLY STATUS AUDIT | | • Gauge vacuum check (min 12 in. Hg at outlets) | | • Oil level sight glasses & running temperature checks | | • Visual leak, vibration, and lead/lag rotation check | | TIER 2: MONTHLY OPERATIONAL INSPECTION | | • Drain receiver vessel condensate | | • Differential pressure (dP) check across filters | | • Test lag pump auto-start sequencing | | TIER 3: QUARTERLY COMPONENT SERVICE | | • Draw synthetic vacuum oil samples for analysis | | • Clean/replace intake filter elements | | • Lubricate drive motor bearings | | TIER 4: ANNUAL ASSE OVERHAUL & CERTIFICATION | | • Full oil + separator cartridge changes | | • Vane wear measurement & clearance verification | | • Alarm setpoint calibration & safety relief testing | | • Complete ASSE 6040 compliance log generation |

    Daily & Weekly Walk-Through Tasks

    • Vacuum Operating Pressure: Confirm the main central manifold vacuum gauge maintains between $19\text{ and }22\text{ in. Hg}$ at the mechanical skid, ensuring adequate dynamic pressure throughout surgical suites.
    • Oil Level and Condition: For lubricated systems, check the sight glass during idle and running modes. Oil should be clear amber; foaming, emulsification (milky white), or black sludge indicates water wash or severe thermal breakdown.
    • Lead/Lag Sequence Verification: Confirm that the central control panel rotates the lead pump role across operating cycles to equalize pump runtime hours.
    • Abnormal Noise and Vibration: Listen for metallic chattering (worn bearings or misaligned claws) or knocking (loose coupling spider).

    Monthly Maintenance Protocols

    • Receiver Condensate Drainage: Open the manual drain ball valve at the bottom of the vacuum receiver tank into an approved container. Even with bacterial filtration, surgical fluids, water vapor, and disinfectants accumulate in the tank.
    • Inlet Bacterial Filter Differential Pressure: Record differential pressure ($\Delta P$) across your duplex bacterial filter banks. Replace filter elements when differential pressure reaches $3\text{ to }5\text{ psid}$ ($6\text{ to }10\text{ in. Hg}$ drop) or as dictated by the filter housing gauge.
    • Lag Pump Step-In Test: Simulate demand by opening the receiver test valve to verify that secondary and tertiary pumps start automatically when system vacuum drops below the programmed setpoint (typically $16\text{ in. Hg}$).

    Quarterly Service Milestones

    • Lubricant Sampling & Analysis: In large continuous-duty rotary vane skids, collect an oil sample to measure viscosity, water dilution, total acid number (TAN), and particulate wear metals.
    • Belt Tension & Alignment: On V-belt driven installations, measure belt deflection with a tension gauge. Check laser pulley alignment and inspect belts for dry rot, glazing, or fraying.
    • Electric Motor Lubrication: Grease motor bearings using manufacturer-approved polyurea or lithium-complex grease. Avoid over-greasing, which destroys internal motor winding insulation.

    Annual Comprehensive Overhaul

    • Oil and Exhaust Mist Eliminator Replacement: Evacuate old lubricant while warm. Install new synthetic medical-grade vacuum oil. Replace exhaust coalescing separator cartridges to maintain backpressure below $3\text{ psig}$.
    • Vane Wear Measurement: On dry and lubricated rotary vane pumps, pull the end plate and measure sliding vane height against manufacturer wear limits using a digital vernier caliper. Replace the full vane set if wear exceeds $10%$ of original height.
    • Check Valve and Solenoid Testing: Inspect the anti-suckback valves on each pump inlet. These valves prevent atmospheric air, oil, or particulate from pulling backward through an idle pump into the vacuum receiver tank.
    • Safety Relief and Alarm Calibration: Calibrate pressure transducers and verify central plant emergency master alarm signals through physical simulation.

    Integrating these steps into your computerized maintenance management system (CMMS) is vital. Many facilities coordinate these deep mechanical steps with their broader annual medical gas inspections to capture both source and distribution network health in one unified compliance file.


    5. Step-by-Step Procedure: Servicing an Oil-Sealed Rotary Vane Vacuum Pump

    To illustrate field execution, here is the approved protocol utilized by ASSE-certified technicians when servicing an oil-sealed rotary vane medical vacuum unit.

    Step 1: System Isolation and Lockout/Tagout (LOTO)

    1. Verify the secondary (lag) pump is fully operational and switched to "Hand" or forced "Lead" mode on the automated central controller to maintain continuous facility vacuum.
    2. Close the intake isolation ball valve between the pump inlet and the central vacuum receiver.
    3. Close the exhaust isolation valve between the pump discharge and the outdoor vent line.
    4. Execute Lockout/Tagout on the targeted unit's electrical disconnect switch at the motor control center (MCC).
    5. Open the pump's atmospheric purge valve or service port to relieve internal negative pressure.

    Step 2: Draining and Flushing the Oil Circuit

    1. Remove the oil drain plug while the unit remains warm from recent operation. Drain used fluid into a Hazmat-compliant waste container.
    2. Inspect the magnetic drain plug for excessive metallic shavings or ferrous debris indicating housing wear or vane disintegration.
    3. Clean the internal oil sump screen (if equipped) using an approved degreasing solvent, then replace the drain plug gasket.

    Step 3: Replacing Exhaust Mist Eliminators (Separators)

    1. Unbolt the exhaust chamber housing access cover.
    2. Remove the old coalescing filter cartridges. Inspect the interior floor of the separator chamber for sludge or carbon deposits.
    3. Lightly oil the Viton or Buna-N O-rings on the replacement separator cartridges. Install the new elements into the baffle deck, torquing mounting studs according to OEM specifications.
    4. Replace the exhaust cover perimeter gasket to prevent oil mist leakage into the mechanical equipment room.

    Step 4: Installing Fresh Synthetic Vacuum Fluid

    1. Fill the oil reservoir through the upper fill port using fresh, high-viscosity-index synthetic vacuum lubricant (ISO VG 68 or 100 as specified by the pump manufacturer).
    2. Continue filling until the lubricant reaches the upper third line of the primary sight glass. Do not overfill, which induces excessive hydraulic drag and oil carryover through the exhaust.
    3. Reinstall and tighten the oil fill cap securely.

    Step 5: Post-Service Commissioning and Run-Testing

    1. Remove Lockout/Tagout hardware and restore power to the drive motor.
    2. Crack the intake isolation valve and bump-start the motor to confirm proper rotational direction (indicated by the directional arrow cast onto the housing).
    3. Open intake and exhaust isolation valves fully.
    4. Run the pump under operational load for 20 minutes. Inspect sight glass clarity, measure motor running current (amps) against nameplate Full Load Amps (FLA), and verify operating temperature with an infrared pyrometer.

    6. Troubleshooting Common Medical Vacuum Failures

    When vacuum systems degrade, swift diagnostic troubleshooting minimizes downtime. Use this decision tree and reference table to identify root causes and corrective actions: | Diagram text | |, |

    Medical Vacuum Pump Diagnostic Matrix

    Observed SymptomProbable Root CauseCorrective Action
    System Vacuum Drop (< 12 in. Hg at outlet)1. Inlet bacterial filter element blinded.
    2. Anti-suckback valve stuck open.
    3. Severe pipeline leak or open room valve.
    4. Internal pump vane wear.
    1. Check $\Delta P$; change filter elements.
    2. Clean/replace check valve assembly.
    3. Conduct acoustic pipeline leak detection.
    4. Pull pump head; measure vane thickness.
    High Pump Operating Temperature1. Restricted exhaust lines or clogged separators.
    2. Low oil level or contaminated fluid.
    3. High ambient room temperature ($> 104^\circ\text{F}$).
    1. Measure backpressure; swap separators.
    2. Drain and refill with synthetic lube.
    3. Service mechanical room HVAC supply.
    Excessive Oil Smoke / Carryover in Exhaust1. Saturated or burst exhaust coalescing element.
    2. Incorrect lubricant viscosity grade.
    3. Overfilled oil reservoir sump.
    1. Install fresh exhaust separator filters.
    2. Drain sump; refill with specified fluid.
    3. Drain fluid down to upper sight glass line.
    Excessive Motor Vibration / Amperage Draw1. Motor-pump coupling insert collapsed.
    2. Impeller mineral scaling (Liquid Ring).
    3. Bearing failure on motor shaft.
    1. Replace flexible elastomeric spider insert.
    2. Chemical acid flush to descale housing.
    3. Rebuild motor or install new bearing set.
    Pump Fails to Hold Vacuum After Shutdown1. Anti-suckback valve seat cracked/damaged.
    2. Flange gasket failure at pump inlet.
    3. Faulty receiver isolation ball valve.
    1. Disassemble, clean, and rebuild check valve.
    2. Replace intake piping flat-face gaskets.
    3. Test and reseat receiver isolation valves.

    7. Bacterial Filtration and Exhaust System Integrity

    A frequently neglected facet of medical vacuum pump preventive maintenance is the bacterial filtration network upstream of the vacuum pumps. Because medical vacuum draws blood, infectious exudates, and aerosolized pathogens from surgical procedures, this infrastructure requires dedicated biosafety precautions. | Diagram text | |, | | Central Receiver | | DUPLEX BACTERIAL FILTER ASSEMBLY | | (99.97% Retention Efficiency at 0.3 Micron Particle) | | [Filter Bank A] [Filter Bank B] | | (Active Online) (Standby Isolated) | | \ / | | [Transparent Glass Drip Flask] | | Central Vacuum Pump |

    Upstream Bacterial Filter Servicing

    NFPA 99 Chapter 5 stipulates that duplex filter assemblies must feature clear glass drip flasks with collection drain valves to gather liquids carried past the bedside vacuum traps. Technicians must:

    • Inspect collection flasks weekly for fluid accumulation.
    • Close isolation valves before draining the flask; bio-fluids must be disposed of under hospital hazardous waste protocols.
    • Replace the high-efficiency borosilicate microglass filter elements every $12\text{ months}$ or when differential pressure gauges register out-of-spec resistance.
    • Ensure filter replacement occurs without system shutdown by shifting flow through the secondary isolated filter canister.

    Exhaust Discharge Line Compliance

    The exhaust piping connected to vacuum pump discharge manifolds handles hot, low-pressure gas laden with oil residue, microscopic moisture, and airborne contaminants. Maintenance teams must inspect the outdoor terminus:

    • Bird Screens & Flapper Dampers: Clean stainless steel pest screens on exterior goose-neck exhaust terminations to prevent wasps, birds, or debris from causing dangerous backpressure.
    • Low-Point Exhaust Drains: Ensure water drainage legs on the vertical exhaust stack are clear. Trapped rainwater draining into the exhaust manifold will flood the exhaust chambers of idle pumps, seizing the pump rotor during startup.

    8. Managing Redundancy and Receiver Tank Maintenance

    Maintaining an NFPA 99-compliant Category 1 vacuum installation means your reserve capacity is always ready to step in when demand spikes or a lead pump trips. | Diagram text | |, | | INCOMING FACILITY PIPING | | ▼ | | ┌───────────────────────┐ | | VACUUM RECEIVER | | * Internal Inspection | | * Manual Condensate | | Drain Valve | | └───────────┬───────────┘ |

    Receiver Tank Structural Inspections

    The vacuum receiver functions as a mechanical buffer, preventing short-cycling of pump drive motors and settling out entrained fluids.

    1. Corrosion Audits: Vacuum receivers operate under external atmospheric pressure. Condensation and biological fluids pool at the bottom of the vessel, promoting corrosion. Periodically utilize ultrasonic thickness testing on the tank's bottom head to ensure structural wall integrity.
    2. Utilizing the Tank Bypass: When servicing the receiver drain, relief valves, or pressure switch manifolds, configure the piping bypass valves to send patient suction directly to the pump inlet skid. This enables tank inspection without interrupting operating room workflows.
    3. Automatic Condensate Traps: If your receiver utilizes an automated float drain or electronic solenoid drain, test and clear the internal strainer monthly to prevent scale from pinning the drain valve open (which introduces a continuous vacuum leak).

    9. Creating Compliant Documentation for Joint Commission Audits

    In the eyes of accreditation organizations, unrecorded maintenance was never performed. CMS Conditions of Participation and The Joint Commission Environment of Care inspections require verifiable, chronological documentation for life-safety utilities.

    A compliant medical vacuum maintenance record must capture:

    • Unique Asset Identifiers: Serial number, equipment ID, drive motor horsepower, and pump type for each operating head on the skid.
    • Calibrated Test Equipment: Serial numbers and calibration expiration dates of digital manometers, tachometers, and multimeters used during maintenance.
    • Hour-Meter Logs: Exact operating hours across all lead, lag, and reserve pump motors to verify runtime balance.
    • Observed vs. Nameplate Amperage: Electrician or technician records proving motors are running safely within rated service factor parameters.
    • Differential Pressure Metrics: Exact measured pressure drops across bacteria filtration and exhaust mist eliminator elements.
    • Technician Certification Credentials: Printed name, signature, and ASSE 6040 or ASSE 6030 certification card numbers confirming personnel competency.

    Facilities rely on unified documentation structures managed by medical gas certification specialists who inspect and catalog vacuum sources, master alarms, and distribution manifolds under a single, audit-ready compliance binder.


    Protect Your Facility with Professional Medical Gas Services

    A failure within your medical-surgical vacuum system is an immediate threat to clinical operations. Adhering to a disciplined medical vacuum pump preventive maintenance schedule preserves vacuum depth, protects drive assemblies, ensures NFPA 99 life-safety compliance, and guarantees that operating rooms run without incident.

    Medical Testing Solutions (MTS) is an industry-leading, ASSE-certified medical gas service and equipment organization headquartered in Fort Lauderdale, Florida. Whether your healthcare facility requires emergency mechanical pump repairs, turnkey medical gas installation to upgrade aging vacuum skids, routine medical gas testing and maintenance, or a full annual medical gas inspection, our ASSE 6030, 6035, and 6040 specialists provide expert, code-compliant solutions.

    We stock medical-grade vacuum components, pump replacement packages, and parts across our equipment catalog. Don't wait for a low-vacuum alarm to compromise patient safety.


    Frequently Asked Questions

    Synthetic lubricants in oil-sealed rotary vane medical vacuum pumps must be changed every 1,000 to 1,500 operating hours, or at least every 3 to 6 months, whichever occurs first. If the fluid appears discolored, emulsified with water, or cloudy during weekly inspections, perform an immediate fluid change, clean the sump, and inspect upstream receiver drainage.

    NFPA 99 dictates that a medical-surgical vacuum system must maintain a minimum operating vacuum level of 12 inches of mercury (12 in. Hg) at the terminal inlet farthest from the central source during peak system demand. To reliably achieve this clinical pressure at patient terminals, central vacuum pump sources are typically configured to cycle between 19 and 22 in. Hg at the mechanical skid receiver.

    Under NFPA 99 (Section 5.1.14.2.3), personnel who maintain medical gas and vacuum equipment must be trained and qualified through an approved certification process. The healthcare industry recognized benchmark is ASSE 6040 (Professional Qualification Standard for Medical Gas Maintenance Personnel). Uncertified personnel performing unauthorized mechanical modifications can jeopardize facility accreditation and introduce patient safety liabilities.

    Medical vacuum systems are engineered and manufactured to stringent NFPA 99 Category 1 Life Support criteria. Key distinctions include mandatory N+1 system redundancy, duplex high-efficiency bacterial filtration upstream of the pumps, explosion-resistant control panel engineering, dedicated outdoor exhaust lines away from building air intakes, and cross-tie receiver bypass piping. Industrial pumps lack these life-safety protections, dual-circuit isolation, and medical-grade biological filtration.

    Exhaust oil smoking or mist carryover in oil-sealed rotary vane pumps is almost always caused by a saturated, ruptured, or improperly seated exhaust coalescing mist eliminator cartridge. Other contributing triggers include running an overfilled oil sump, using the wrong lubricant viscosity, or experiencing severe high-temperature continuous duty that breaks down the oil's vapor pressure.

    This article is provided for educational purposes and reflects industry standards as of publication. Always verify against current NFPA 99, CGA, and AHJ requirements. Medical Testing Solutions is ASSE-certified and ready to help — contact us for facility-specific guidance.

    Request a quote for your facility

    Talk with Medical Testing Solutions about your next inspection, repair or equipment request.

    Get a quote in 1 business day

    I agree to receive text messages from Medical Testing Solutions, L.L.C. at the phone number provided, including informational and marketing messages. Consent is not a condition of purchase. Message frequency varies. Message & data rates may apply. Reply STOP to opt out or HELP for help. See our Privacy Policy and Messaging Terms.

    Prefer to talk? Call (754) 315-1078

    Related articles